Admin
Well-Known Member
Staff member
Administrator
Randomising content can be used in various ways, the most common of which is for header images and logos, or advertising banners.
This guide will explain how it can be done simply with two lines of code (which ironically has taken a hundred lines of explanatory text).
For the purposes of this guide, we'll be adding an image in the Container header advertising position, which will randomly change between 5 different images.
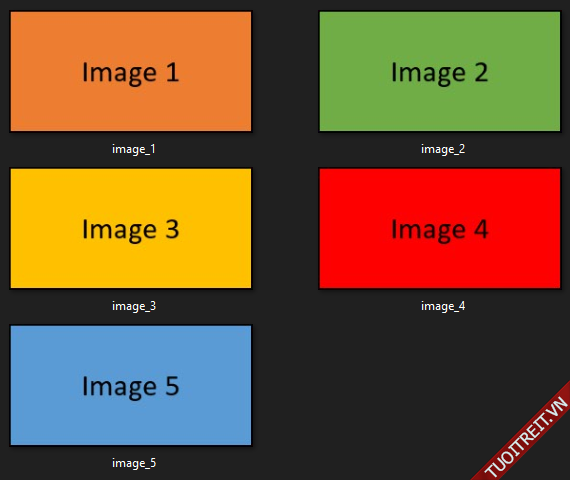
I have simply created 5 coloured blocks.

The naming of the images is important.
They must all have the same root name, end with a different integer starting from 1 in numerical order, and have the same file extension, in this example that is .png.
So as you can see, they are all named image and I have then added a separator _, which isn't necessary but it does make the file names easier to read.
Lastly, they all end in a number from 1 to 5. There must be no gaps in these numbers - you can't for example number them 1, 2, 4, 6, 8, if randomising between 5 images.
You can name them however you want, as long as you follow that convention.
Another example would be:
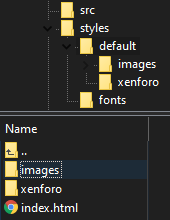
I created a new /images directory in /styles/default like so:

You can upload them wherever you wish.
This is simply:
There are only two components here which are important.
The first is $int which is the name you are assigning to the variable.
It can be anything you like.
The second is the 5 in ($xf.time % 5).
That value must match the number of images you are going to be rotating between.
The randomness comes from the server time, which is called via $xf.time.
The next line of code will call the images. That's standard HTML with a bit of XF syntax for the relative path and to construct the file name.
Breaking that down, you should be able to see that it's:
The periods . either side of $int perform concatenation, so the resulting image path is styles/default/images/image_$int.png, where $int is a value from 1 to 5.
So in this case, the image path for the first image is styles/default/images/image_1.png.
You can of course expand the code to add a URL, alt text, styling, etc.
For example:

That's it!
Now each time the page is refreshed, one of five images will be displayed.

This guide will explain how it can be done simply with two lines of code (which ironically has taken a hundred lines of explanatory text).
For the purposes of this guide, we'll be adding an image in the Container header advertising position, which will randomly change between 5 different images.
Prepare the images
The first step is to prepare your images.I have simply created 5 coloured blocks.

The naming of the images is important.
They must all have the same root name, end with a different integer starting from 1 in numerical order, and have the same file extension, in this example that is .png.
So as you can see, they are all named image and I have then added a separator _, which isn't necessary but it does make the file names easier to read.
Lastly, they all end in a number from 1 to 5. There must be no gaps in these numbers - you can't for example number them 1, 2, 4, 6, 8, if randomising between 5 images.
You can name them however you want, as long as you follow that convention.
Another example would be:
- banner1.jpg
- banner2.jpg
- banner3.jpg
- banner4.jpg
- banner5.jpg
I created a new /images directory in /styles/default like so:

You can upload them wherever you wish.
Creating the code
Next we create the code for the random number generation.This is simply:
HTML:
<xf:set var="$int" value="{{ ($xf.time % 5) + 1 }}" />There are only two components here which are important.
The first is $int which is the name you are assigning to the variable.
It can be anything you like.
The second is the 5 in ($xf.time % 5).
That value must match the number of images you are going to be rotating between.
The randomness comes from the server time, which is called via $xf.time.
The next line of code will call the images. That's standard HTML with a bit of XF syntax for the relative path and to construct the file name.
HTML:
<img src="{{ base_url(('styles/default/images/image_' . $int . '.png')) }}" />Breaking that down, you should be able to see that it's:
- referencing the directory we created earlier - /images
- with the image file name we saved them as - image_ (without the integer)
- the variable named above - $int (which provides the integer)
- and the file extension - .png
The periods . either side of $int perform concatenation, so the resulting image path is styles/default/images/image_$int.png, where $int is a value from 1 to 5.
So in this case, the image path for the first image is styles/default/images/image_1.png.
You can of course expand the code to add a URL, alt text, styling, etc.
For example:
HTML:
<a href="https://www.example.com">
<img src="{{ base_url(('styles/default/images/image_' . $int . '.png')) }}" alt="Header image" width="300" height="150" />
</a>
Adding the code
The final step is to add the code to the template, which for this guide is the Container header advertising position.
HTML:
<xf:set var="$int" value="{{ ($xf.time % 5) + 1 }}" />

<img src="{{ base_url(('styles/default/images/image_' . $int . '.png')) }}" />
That's it!
Now each time the page is refreshed, one of five images will be displayed.

